How to Install Node.js on Centos and Ubuntu
![]() The Node.js run-time environment includes everything you need to execute a program written in JavaScript.
The Node.js run-time environment includes everything you need to execute a program written in JavaScript.
Node.js came into existence when the original developers of JavaScript extended it from something you could only run in the browser to something you could run on your machine as a standalone application.
Now you can do much more with JavaScript than just making websites interactive.
JavaScript now has the capability to do things that other scripting languages like Python can do.
Both your browser JavaScript and Node.js run on the V8 JavaScript runtime engine. This engine takes your JavaScript code and converts it into a faster machine code. Machine code is low-level code which the computer can run without needing to first interpret it.
What is Node.js?
- Node.js is an open source server environment
- Node.js is free
- Node.js runs on various platforms (Windows, Linux, Unix, Mac OS X, etc.)
- Node.js uses JavaScript on the server
Why Node.js?
Node.js uses asynchronous programming!
A common task for a web server can be to open a file on the server and return the content to the client.
Here is how PHP or ASP handles a file request:
- Sends the task to the computer’s file system.
- Waits while the file system opens and reads the file.
- Returns the content to the client.
- Ready to handle the next request.
Here is how Node.js handles a file request:
- Sends the task to the computer’s file system.
- Ready to handle the next request.
- When the file system has opened and read the file, the server returns the content to the client.
Node.js eliminates the waiting, and simply continues with the next request.
Node.js runs single-threaded, non-blocking, asynchronously programming, which is very memory efficient.
What Can Node.js Do?
- Node.js can generate dynamic page content
- Node.js can create, open, read, write, delete, and close files on the server
- Node.js can collect form data
- Node.js can add, delete, modify data in your database
What is a Node.js File?
- Node.js files contain tasks that will be executed on certain events
- A typical event is someone trying to access a port on the server
- Node.js files must be initiated on the server before having any effect
- Node.js files have extension “.js”
If you are looking to install Node.js or a Centos or Ubuntu server, here are the steps to follow to get started.
Ubuntu 16.x or 18.x
The latest version of Nodejs is not available through the default repository. But not to worry, you can use NodeSource distribution as the following.
- Log in to the server as root
- Execute the following
curl -sL https://deb.nodesource.com/setup_11.x | sudo -E bash -The above will download and install the NodeSource Node.js repository. At the end of the above output, you should see something like this.
Reading package lists... Done

## Run `sudo apt-get install -y nodejs` to install Node.js 11.x and npm
## You may also need development tools to build native addons:
     sudo apt-get install gcc g++ make
## To install the Yarn package manager, run:
     curl -sL https://dl.yarnpkg.com/debian/pubkey.gpg | sudo apt-key add -
     echo "deb https://dl.yarnpkg.com/debian/ stable main" | sudo tee /etc/apt/sources.list.d/yarn.list
sudo apt-get update && sudo apt-get install yarn- Next, you will have to install the nodejs with the following command.
apt-get install -y nodejsIt will take a few seconds and once done; you should be able to verify the version.
root@geekflarelab:~# nodejs -v
v11.7.0
root@geekflarelab:~#
And, as you can see, it has installed 11.7.0 version.
CentOS/RHEL 7.x
First, you need to install the NodeSource repository with the following command.
curl -sL https://rpm.nodesource.com/setup_11.x | bash -And then, install the Nodejs as below.
yum install -y nodejsIt will take a few seconds, and at the end, you should see something like below.
Running transaction
  Installing : 2:nodejs-11.7.0-1nodesource.x86_64                                                                                                       1/1
  Verifying  : 2:nodejs-11.7.0-1nodesource.x86_64                                                                                                       1/1

Installed:
  nodejs.x86_64 2:11.7.0-1nodesource

Complete!
[root@geekflarelab ~]#
This means the Node.js is installed and can be verified with -v syntax.
[root@geekflarelab ~]# node -v
v11.7.0
[root@geekflarelab ~]#
The above instruction should also work for Fedora 29 or later.
Installing from Source Code
What if you are in a DMZ environment where you can’t connect to the Internet? You still can install by building the source code. The procedure is not as easy as above through binary distribution but doable.
- Login to Ubuntu or CentOS server
- Download the latest or the one you want from here using
wget. I am trying the latest one.
wget https://nodejs.org/dist/v11.7.0/node-v11.7.0.tar.gz- Extract the downloaded file with
tarcommand
tar -xvf node-v11.7.0.tar.gz- You should see a new folder created in the present working directory
drwxr-xr-x 9 502 501 4096 Jan 17 21:27 node-v11.7.0- Go to the newly created folder
cd node-v11.7.0/And, its time to build the Node.js from source now.
But, before you proceed, ensure you have the pre-requisites installed.
If using Ubuntu then install the pre-requisites with below
apt-get update
apt-get install gcc g++ clang make
and for CentOS
yum update
yum install gcc clang gcc-c++- Let’s built it now
./configure- Ensure no error and then next
make
make install
It will take some time to build and once done; you can verify the installed version by executing below.
root@geekflarelab:~# node --version
v11.7.0
root@geekflarelab:~#
Create Test Web Server
To test the Node.js installation on Centos, create a web server and then run it with Node.js.
Create a file called web_server.js.
vi web_server.jsPlace the below contents into the web_server.js file.
const http = require('http');
const port = 9000;
const server = http.createServer((req, res) => {
   res.writeHead(200, {'Content-Type': 'text/plain'});
   res.end('Hello World\n');
});
server.listen(port, () => {
  console.log(`Server running at http://your-ip-add-ress:${port}/`);
});
Now, start the web server using the below command.
node --inspect web_server.js
When you run the web_server.js file, you will get the following message in your terminal.
Debugger listening on ws://127.0.0.1:9229/25dae7a2-afb9-4244-b827-8264791d70ff
For help, see: https://nodejs.org/en/docs/inspector
Server running at http://your-ip-add-ress:9000/
The above output confirms that the web server has been started and listening on port 9000.
Firewall
Allow the port 9000 in the firewall to access the web application from external machines.
firewall-cmd --permanent --add-port=9000/tcp
firewall-cmd --reload
Test Node.js
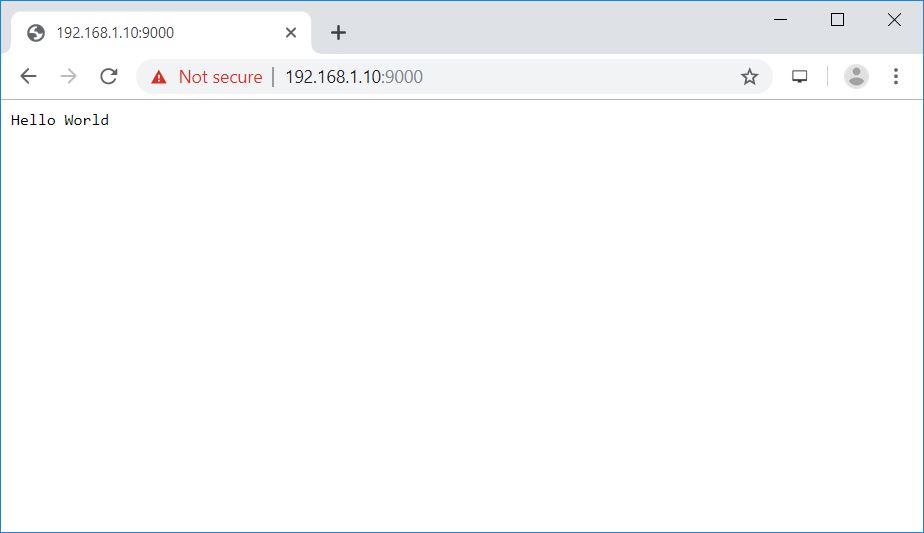
Open a web browser and navigate it to the following URL.
You should get the web page like below.